Sunday, March 27, 2011

Darn Paste – Why doesn’t understand what I want to do???

You have some text in a different file, and you want to copy it to your new document, but when you paste it, it screws up.  Either the formatting is wacky, or other things go on.
I was working on my resume this morning, and I had a graphic line at the top by my name.  After listening to a class given by Dirk Spencer, author of Resume Psychology, where he stated that most of the job boards will treat anything in a text box or something similar as a graphic and don’t do it.
Well, I tried selecting the line, I tried copying and pasting the text before and after the line, and everything I pasted, that blasted line would come over into the new document.  Grumble, grumble grumble.
Starting in 2003, Word gave you choices when you pasted text into a document.  You would see a clipboard with a drop down arrow.  If you clicked the arrow you’d see these choices

·         Keep Source Formatting:  Keep it how it looked in the old document, including graphics and spacing around the text
·         Match Destination Formatting:  Use my current styles and choices
·         Keep Text Only:  Get rid of anything that isn’t just the text.

In version 2010, it looks slightly different. 
Now the choices are the three icons, Keep Source Formatting, Merge Formatting (same as the destination formatting from the previous versions) and Text only.
By choosing text only, I was able to get rid of that blasted line. 
Paste Special
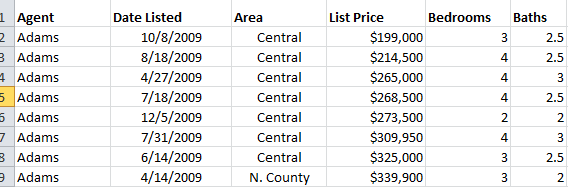
Paste special is really good when you need to put part of an Excel spreadsheet into a Word document.
You could do just a regular paste, but if you need to update the information

Notice how many more options you’ve gained.
Your first two haven’t changed, as they are:
·         Keep Source Formatting
·         Merge formatting

And the table from Excel is converted to a Word table in both cases, and is editable.  Any changes you make to the data in the Word document won’t be sent back to Excel and vice versa.
·         Link and Keep Source Formatting
·         Link and Keep Destination formatting
This option establishes a link between the two files, so if this was a monthly report, you could change the numbers in Excel, and they would show up changed in the Word document.
The picture icon would insert the Excel data in as a picture, so no one would be able to edit the data.
The last one is the text only.  Word inserts the data without the table format, and you can edit the data, and there’s no formatting.
In earlier versions of Paste Special, it would give you text, link or embed the text.  Text and linked you know, but Embed is new.  Embed was really good when you need to put a copy of the Excel file into the Word document.  It was good when you were going to separate the Word and Excel files. 
One word of warning on linked files.  The receiving program need to always know where the source document is (in our case Word is the receiver and Excel is the source).   If you move the source, then you will have to tell the receiver where it went. 
Good luck and let me know if you have any questions.

Lexi

 Now we get into some changes:

Thursday, March 24, 2011

One Note

Now where is that post it note???
If you haven’t played with OneNote, you’ve been making life harder for yourself.
What is one note? It’s the electronic equivalent of a physical paper notebook.  And keep that image in mind as you read this.  You can create multiple notebooks, so you can have one for personal stuff, one for receipts, one for recipes, one for the financial documents with the supporting documents (no matter what program they were done in) and one for purchase orders.

At my last company we used one note for the department for all those “how to” documents.  Especially the ones that we would do about once every six months.  You can include screen shots, pictures, printing, copy paste in your notebook.  My former boss is very happy that we did this, because he’s having to do my job.
Inside of each notebook, you can have section tabs to keep it in order.  So you could do one for each quarter, month, vendor, and program.  As you can see on the graphic above, the left side contains the notebooks (Work Notebook, Personal Notebook) and under each notebook listing, you’ll see the different tabs.  Notice that the tabs are also listed at the top.  Because I shrunk the width, you don’t see all the top tabs.
On the right are all of the pages in the section.  The titles that appear on the right are generated from the bubble at the top (notice that Store personal information in this section in the bubble is the same as the white tab on the right).
To create a notebook, go to file, new notebook.   You can choose to keep it on your computer, a network drive or with 2010, on the web.  You may want to save it on the network, as One Note has the ability to synchronize the notebooks between users, so the latest information is almost immediately available to the other people who have that notebook open.
So now that I have you excited about creating One Note notebooks, how do you get your material in there?  That’s easy!!!  You can:
·         Copy and paste
·         Send to One Note – You’ll find this in Outlook 2007 and 2010.  When you open an email, you’ll see a send to One Note
·         You have a print driver called “Send to OneNote, which can be used with any application that you can print.
More later!!!

Tuesday, March 22, 2011

Darn! Just found out that Aebleskiever should be bolded, italics and red….and it’s all throughout my document.

And I don’t want to deal with styles….so how can I do this quickly and easily?
The answer is Format Painter. 
What’s that?
 It’s the little paint brush that you see on the formatting toolbar or the Home Ribbon.

Okay, I’ve found it….now what?
Format the text the way you want it to look.
Done.  Next?
Highlight the text that is formatted the way you want.  If you are going to just format one thing the same way, then click on Format Painter one time.   If you’re going to use it more than once, double click on Format Painter.  If you double click, it will stay on until you click it off, or do something else in Word.
By the way, that’s how I formatted this blog entry.  And when you’re so excited about this, then go take a peek in the other Office programs and notice that Format Painter is waiting for you.
So what’s an Aebleskeiver?
It’s a Danish pancake.

Sunday, March 20, 2011

Okay, I have a bunch of data, but how do I filter it??

To be able to filter data in Excel, you must have a data table. 

What’s a data table?  A data table is one where the first row is labels and each row below the label row contains data.  Now, not every cell has to contain data, but every row has to contain data.
If you have a blank row in your data table, Excel assumes that it’s the end of your data table.
To filter, choose filter  (autofilter).  When you do, you’ll see triangles to the right of each column’s label.  If they don’t appear, then you may be clicked outside of the data  table.  Click on any cell in the data table and then choose filter (autofilter).

The next step is to click on the triangle on the column you want to filter on.  You can do more than one column.
Depending on the data, Excel may list the different column’s data.    It will give you all the data in the column for you to choose what you want to see.

If the data is a date (3/14/11), then Excel will give you the data by year and then month.  You can drill down and choose a particular set of days if you wish.  Click the pluses in front of the months to drill down.
This example is Excel 2010, but similar choices are in older versions, top/bottom quantity and either percent or items.  There are choices as you can see.
Now that you’ve filtered it, and saved it with the filter; you now come back and open the file and don’t remember what you filtered on.  How do you tell?  If you have an older version of Excel, the triangles will be blue instead of black.  In the newer versions (2007 & 2010) they’ve changed from a blue triangle to a funnel.  It makes it quicker to spot with the funnel than the blue triangle. 
To unfilter the data, click on the triangle (funnel) and choose select all.  It will unfilter all the data in that column.

Changing the subject a little bit, do you when you want to sort data on a certain column, choose the column and then cuss because it just sorted that column, and is no longer attached to the correct rows?  The problem is when you choose a column and tell Excel to sort, that you want it to only sort that column.  What you want to do, is click in a cell in that column and then tell Excel to sort.  It will sort on the column BUT keep the rows together with the data you sorted on.


Monday, March 7, 2011

Now where is that post it note???

If you haven’t played with OneNote, you’ve been making life harder for yourself.
What is One Note? It’s the electronic equivalent of a physical paper notebook. And keep that image in mind as you read this. You can create multiple notebooks, so you can have one for personal stuff, one for receipts, one for recipes, one for the financial documents with the supporting documents (no matter what program they were done in) and one for purchase orders.
At my last company we used One Note for the department for “how to” documents; especially the ones that we would do about once every six months. You can include screen shots, pictures, printing, copy paste in your notebooks.
Inside of each notebook, you can have section tabs to keep it in order. So you could do one for each quarter, month, vendor, and program. As you can see on the graphic above, the left side contains the notebooks (Work Notebook, Personal Notebook) and under each notebook listing, you’ll see the different tabs. Notice that the tabs are also listed at the top. Because I shrunk the width, you don’t see all the top tabs.
On the right are all of the pages in the section. The titles that appear on the right are generated from the bubble at the top of each page (notice that Store personal information in this section in the bubble is the same as the white tab on the right).
To create a notebook, go to file, new notebook.  You can choose to keep it on your computer, a network drive or with 2010, on the web. You may want to save it on the network, as One Note has the ability to synchronize the notebooks between users, so the latest information is almost immediately available to the other people who have that notebook open.
So now that I have you excited about creating One Note notebooks, how do you get your material in there?  That’s easy!!!  You can:
·         Copy and paste
·         Send to One Note button – You’ll find this in Outlook 2007 and 2010. When you open an email, you’ll see a send to One Note.  It’s
·         You have a print driver called “Send to OneNote, which can be used with any application that you can print.
More later!!!

Tuesday, March 1, 2011

Select…How do you select????

One thing that I see people do, is not take advantage of all the different ways.  So here we go from small selection to the entire document:
Okay, first open Word and a document so you can give this stuff a try…if you don’t try it, you won’t remember.
Word:  Double click anywhere in the word
Line of text:  Here’s the magic.  Notice that your mouse pointer points to the left.  Move to the left margin, and notice it will flip to the right….Magic right?  Now click and the line is chosen.  If you hold the mouse button down, it will continue to select.
Sentence:  Ctrl and then click anywhere in the sentence
Paragraph:  Triple click anywhere inside the paragraph or get the magic right pointing mouse pointer and double click.
Large block of text:  One thing that I see people do when they have more than a screen’s worth of text, is they will click, and drag with their mouse, and then the screen zooms up, and then they will go back towards the top because it selected too much.  Talk about driving yourself nuts….okay here’s the secret.  Click at one end of your selection (doesn’t matter which end). Release the mouse!!!!  Now scroll to the other end, hold down the shift key and now click….you should have everything in between selected.
Entire document:  Get your magic right facing mouse pointer and triple click…or quicker, Ctrl A.
Vertical Selection:  Now here’s the one that most people don’t know, If you have a tabbed table, you can select just one column or a vertical selection.  Click here you want it to start.  Release, hold down your Alt key and then click and drag.  You know it’s working correctly when it doesn’t try to grab the entire line when you drag down.